Set Up a Pricing Page
A pricing page shows a user what upgrade options are available when they've installed your app. It displays all the key features included with each pricing tier.
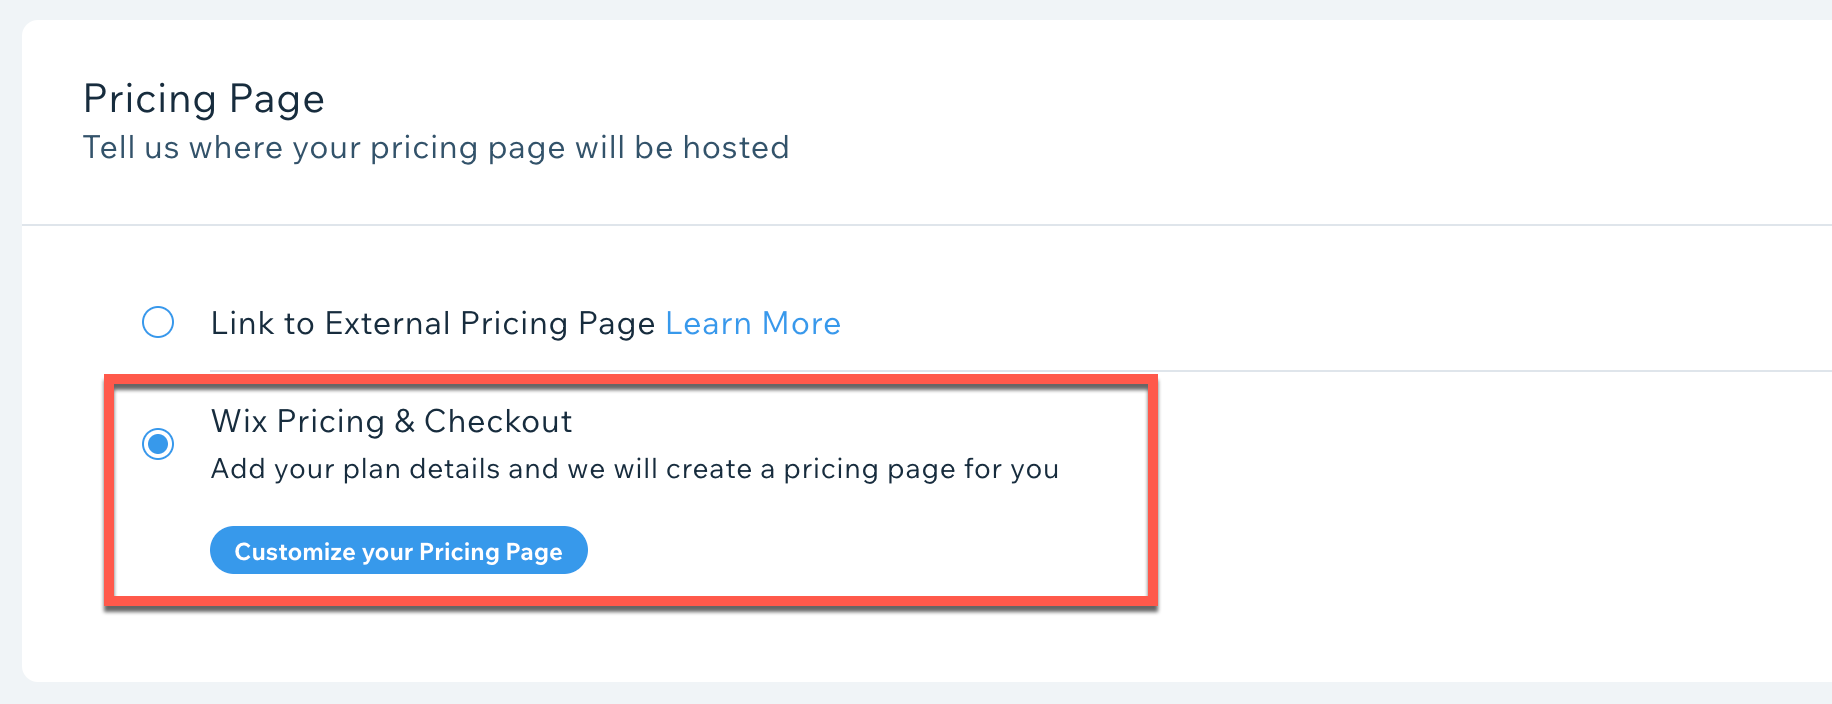
This article focuses on using Wix Pricing & Checkout to manage your pricing. If you want to host it yourself then read how to set up an External Pricing Page.
Important:
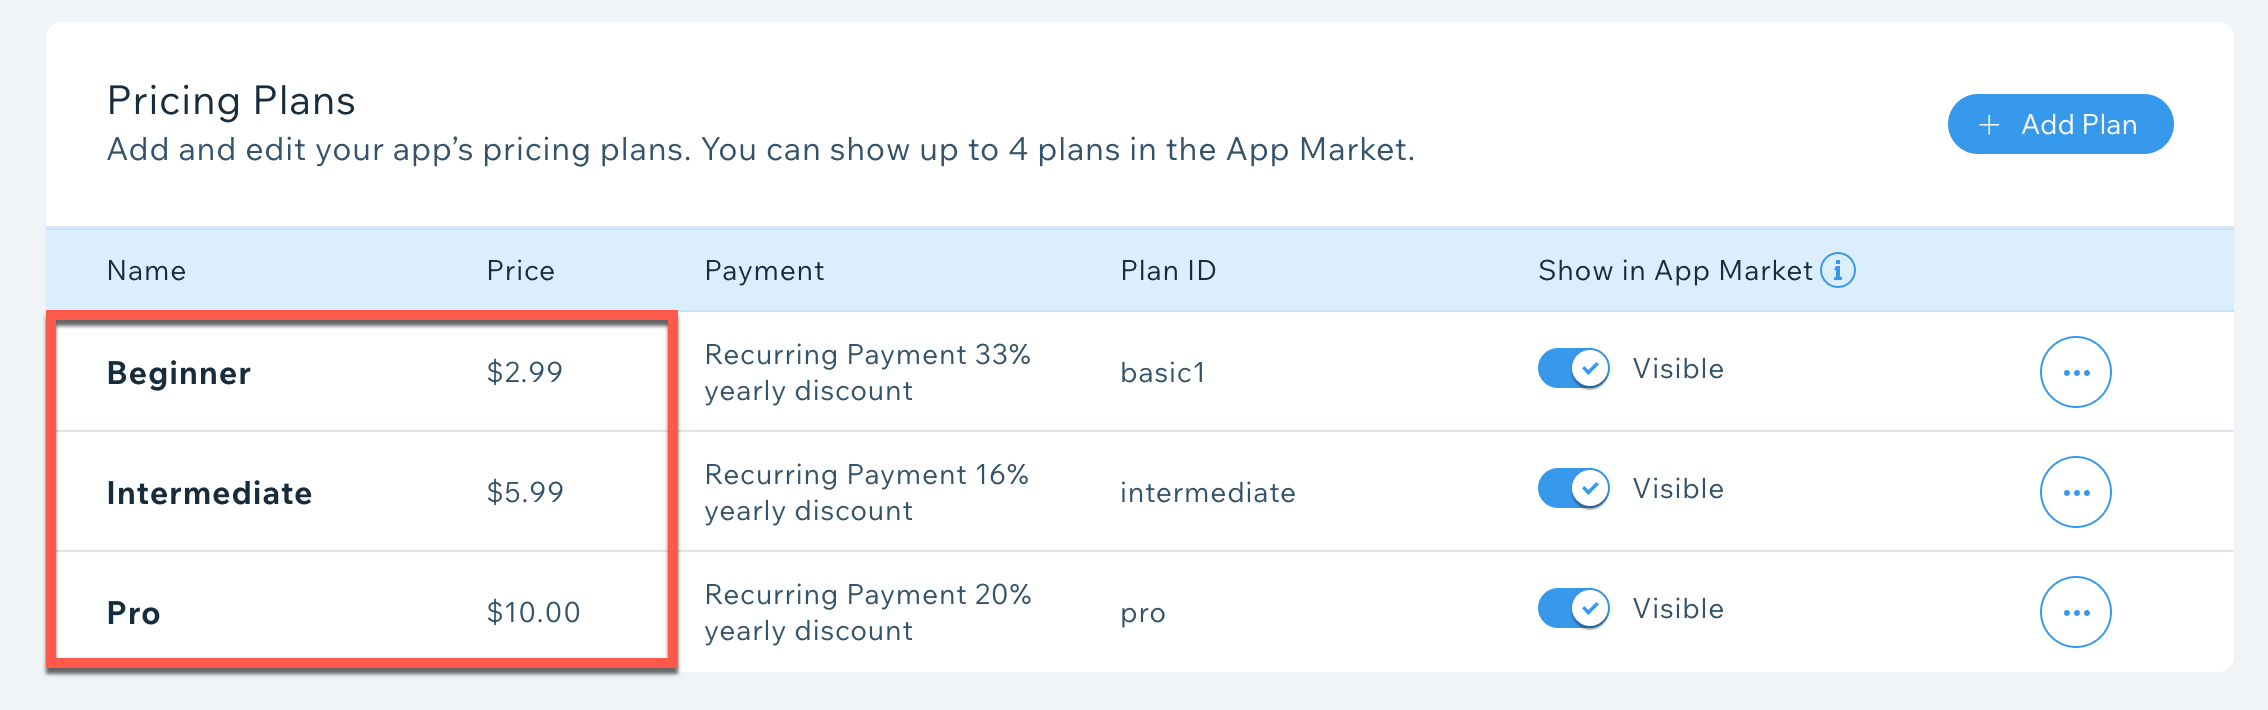
Before going any further, you'll need to make sure you've set up your Pricing Plans.
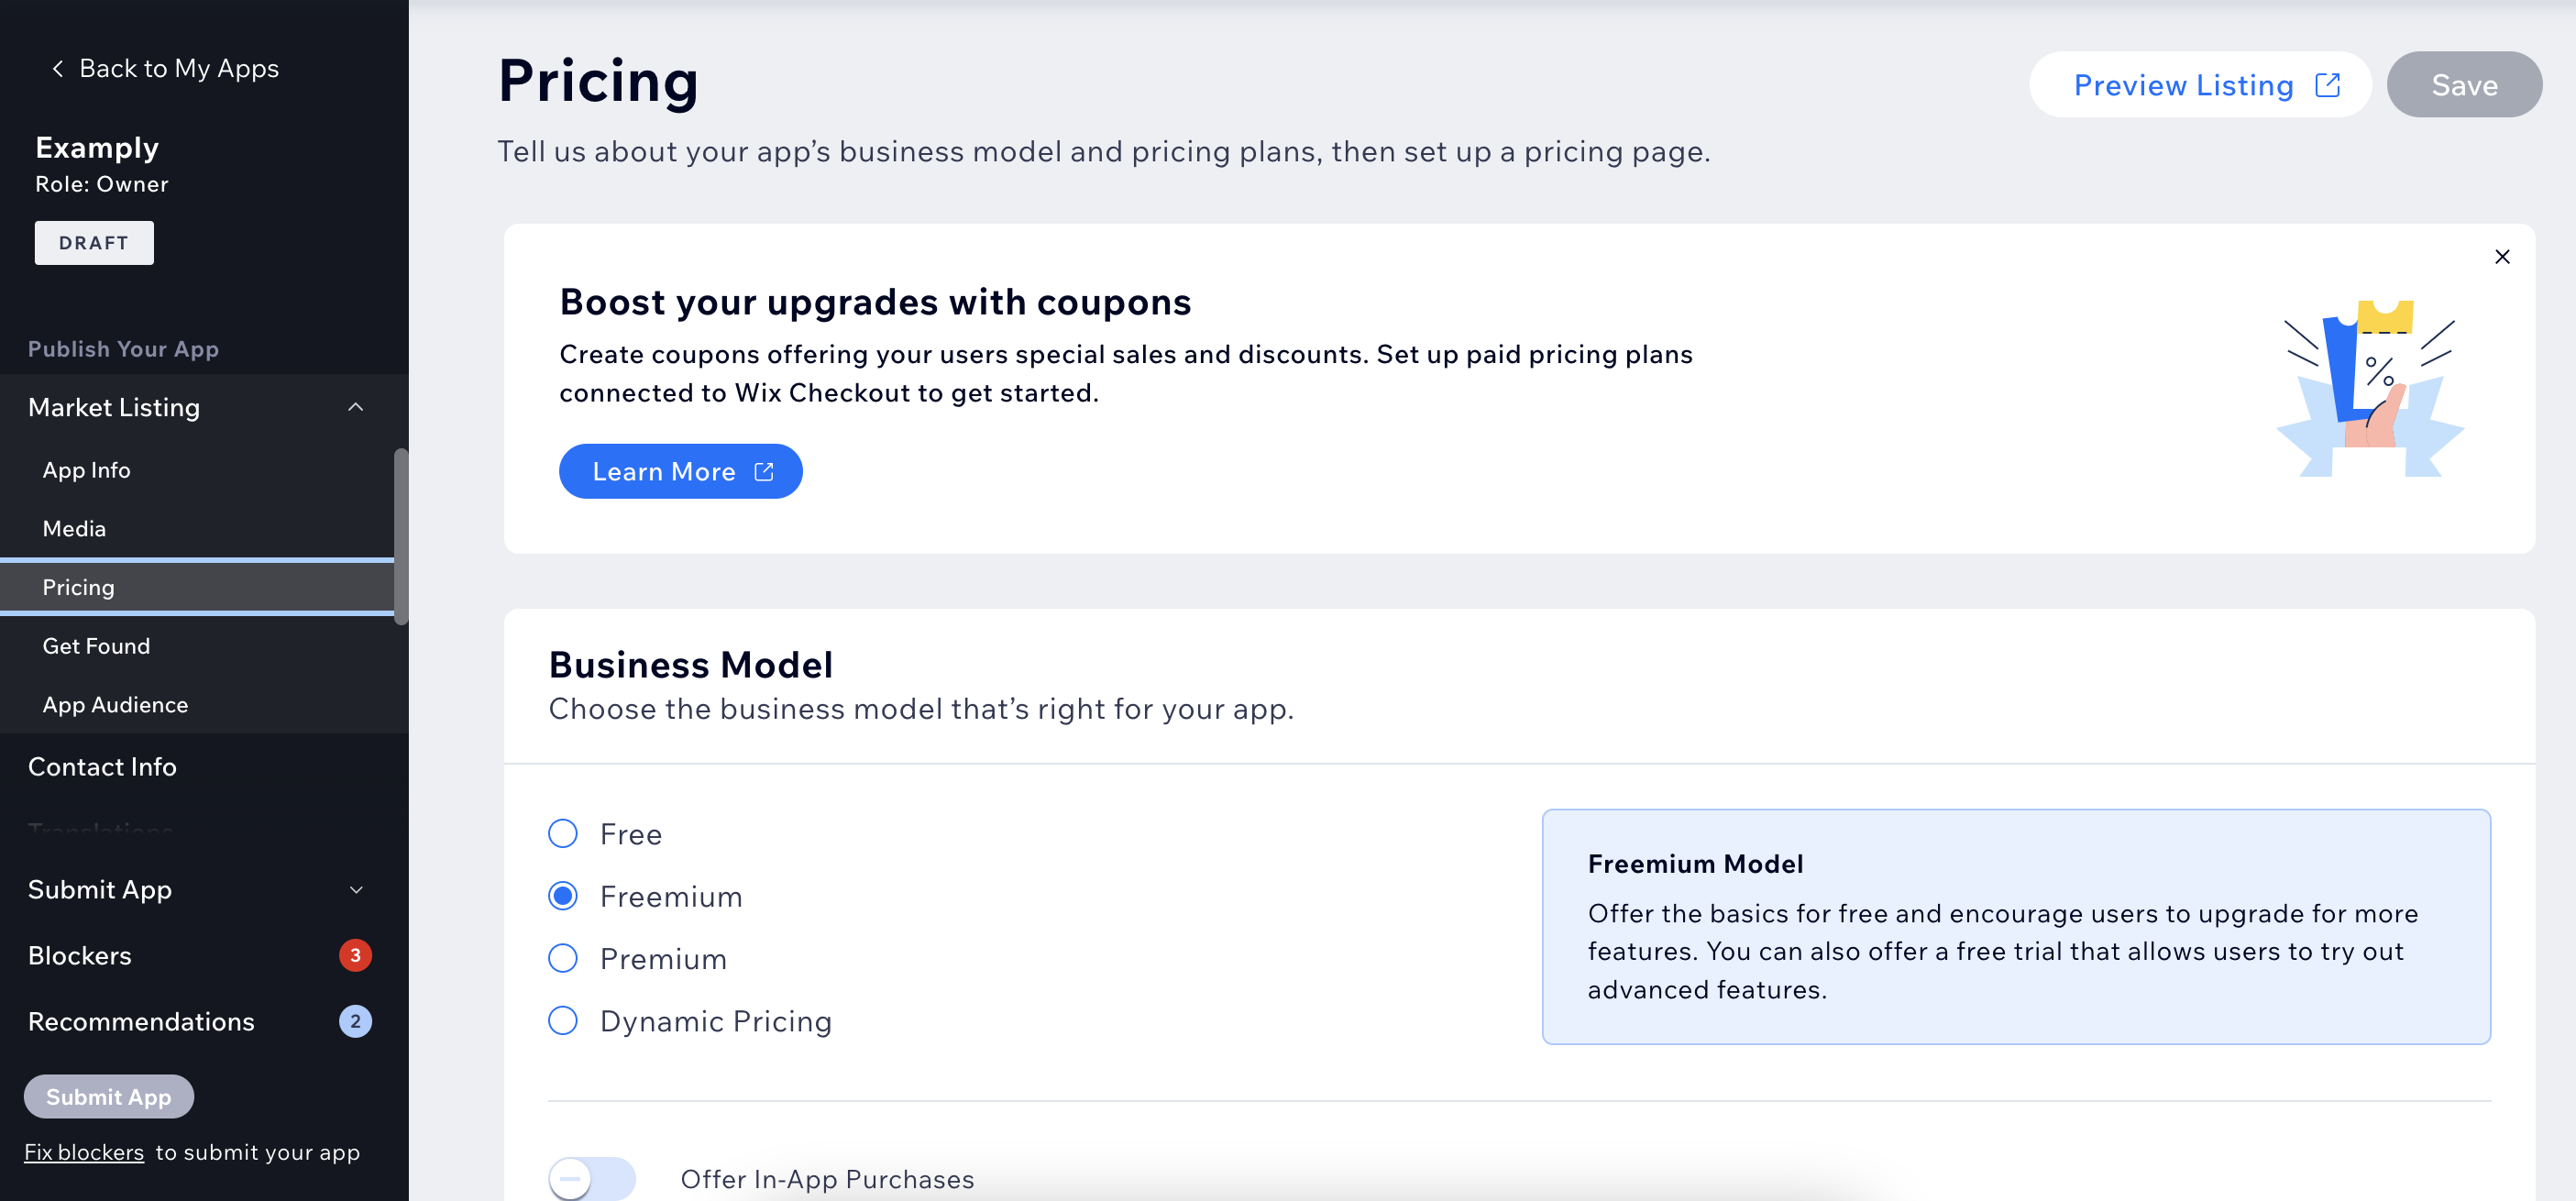
You can find the Pricing tab in the Wix Developers Center under Market Listing:
1. Scroll down to Pricing Page, select Wix Pricing & Checkout, then click Customize your Pricing Page.
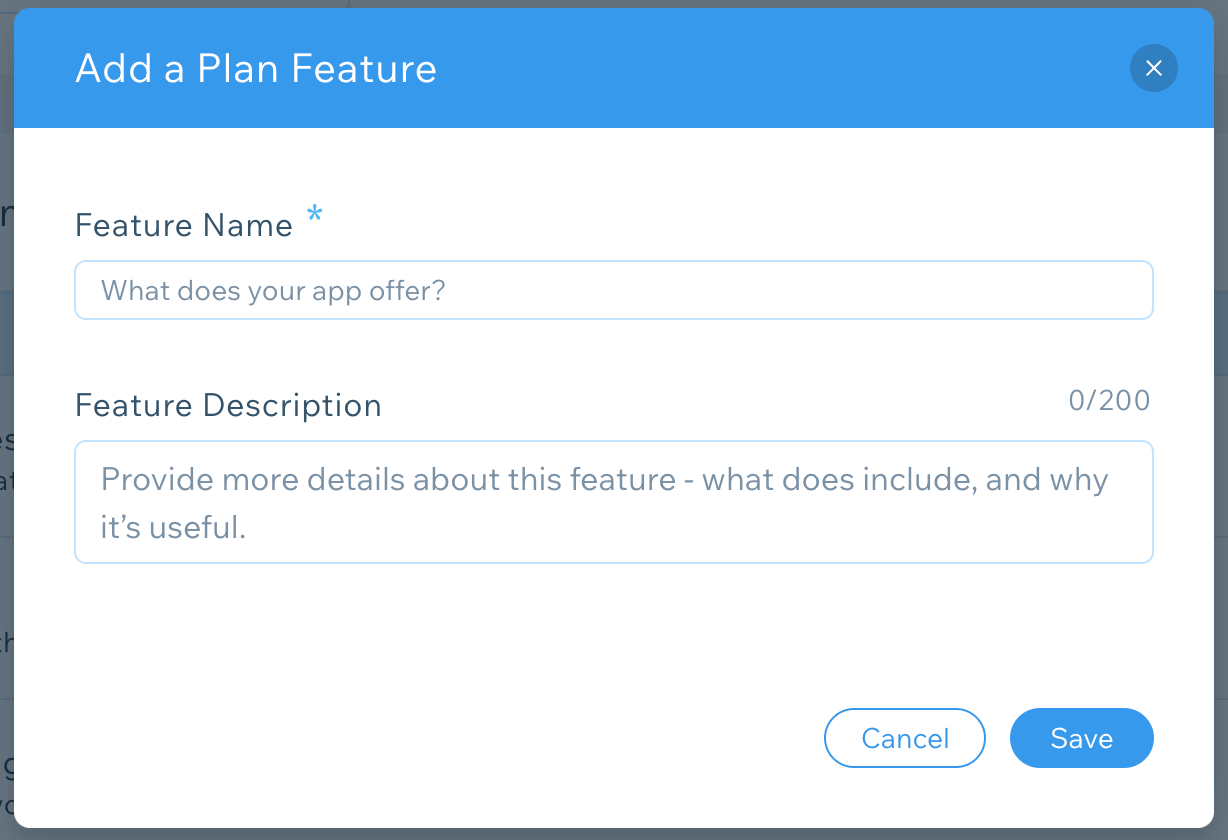
2. Click Add Plan Feature.
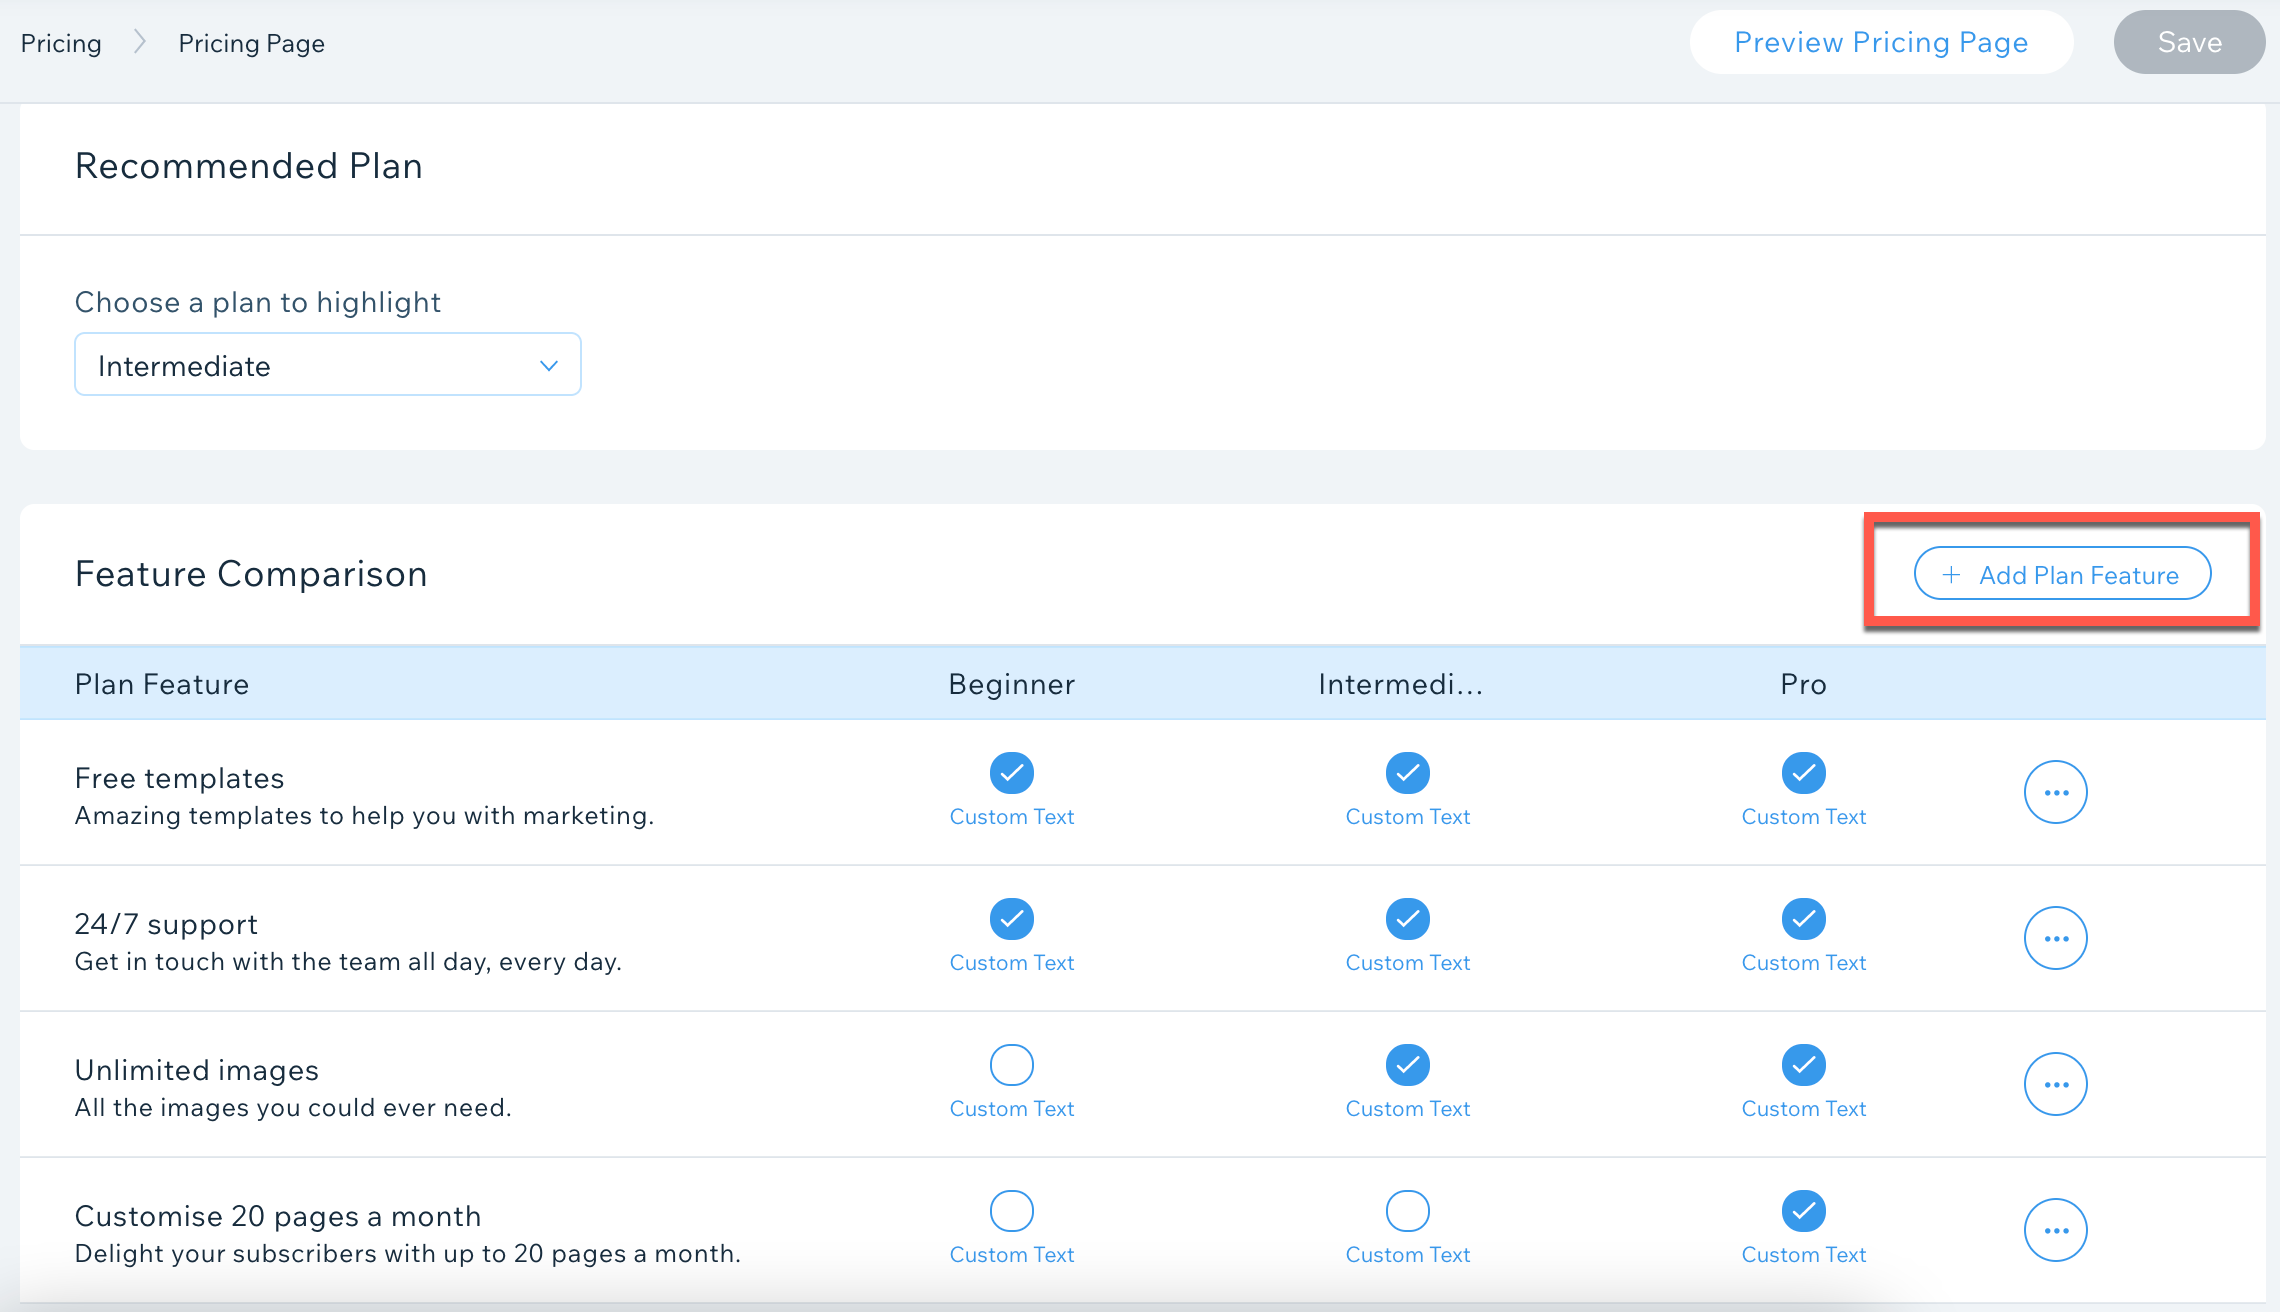
3. Add a Feature Name and Feature Description (up to 200 characters). The description should say what it includes and why it's useful.
4. Click Save.
Note: A maximum of four plans can be shown on the Pricing Page.
5. Once you've added your app's features, select the features you want to be available under each Plan in the Feature Comparison grid – make sure you distribute these features progressively, with better features reserved for more expensive Plans.
6. Choose a plan to highlight – this is shown as 'Most Popular' on your Pricing Page.
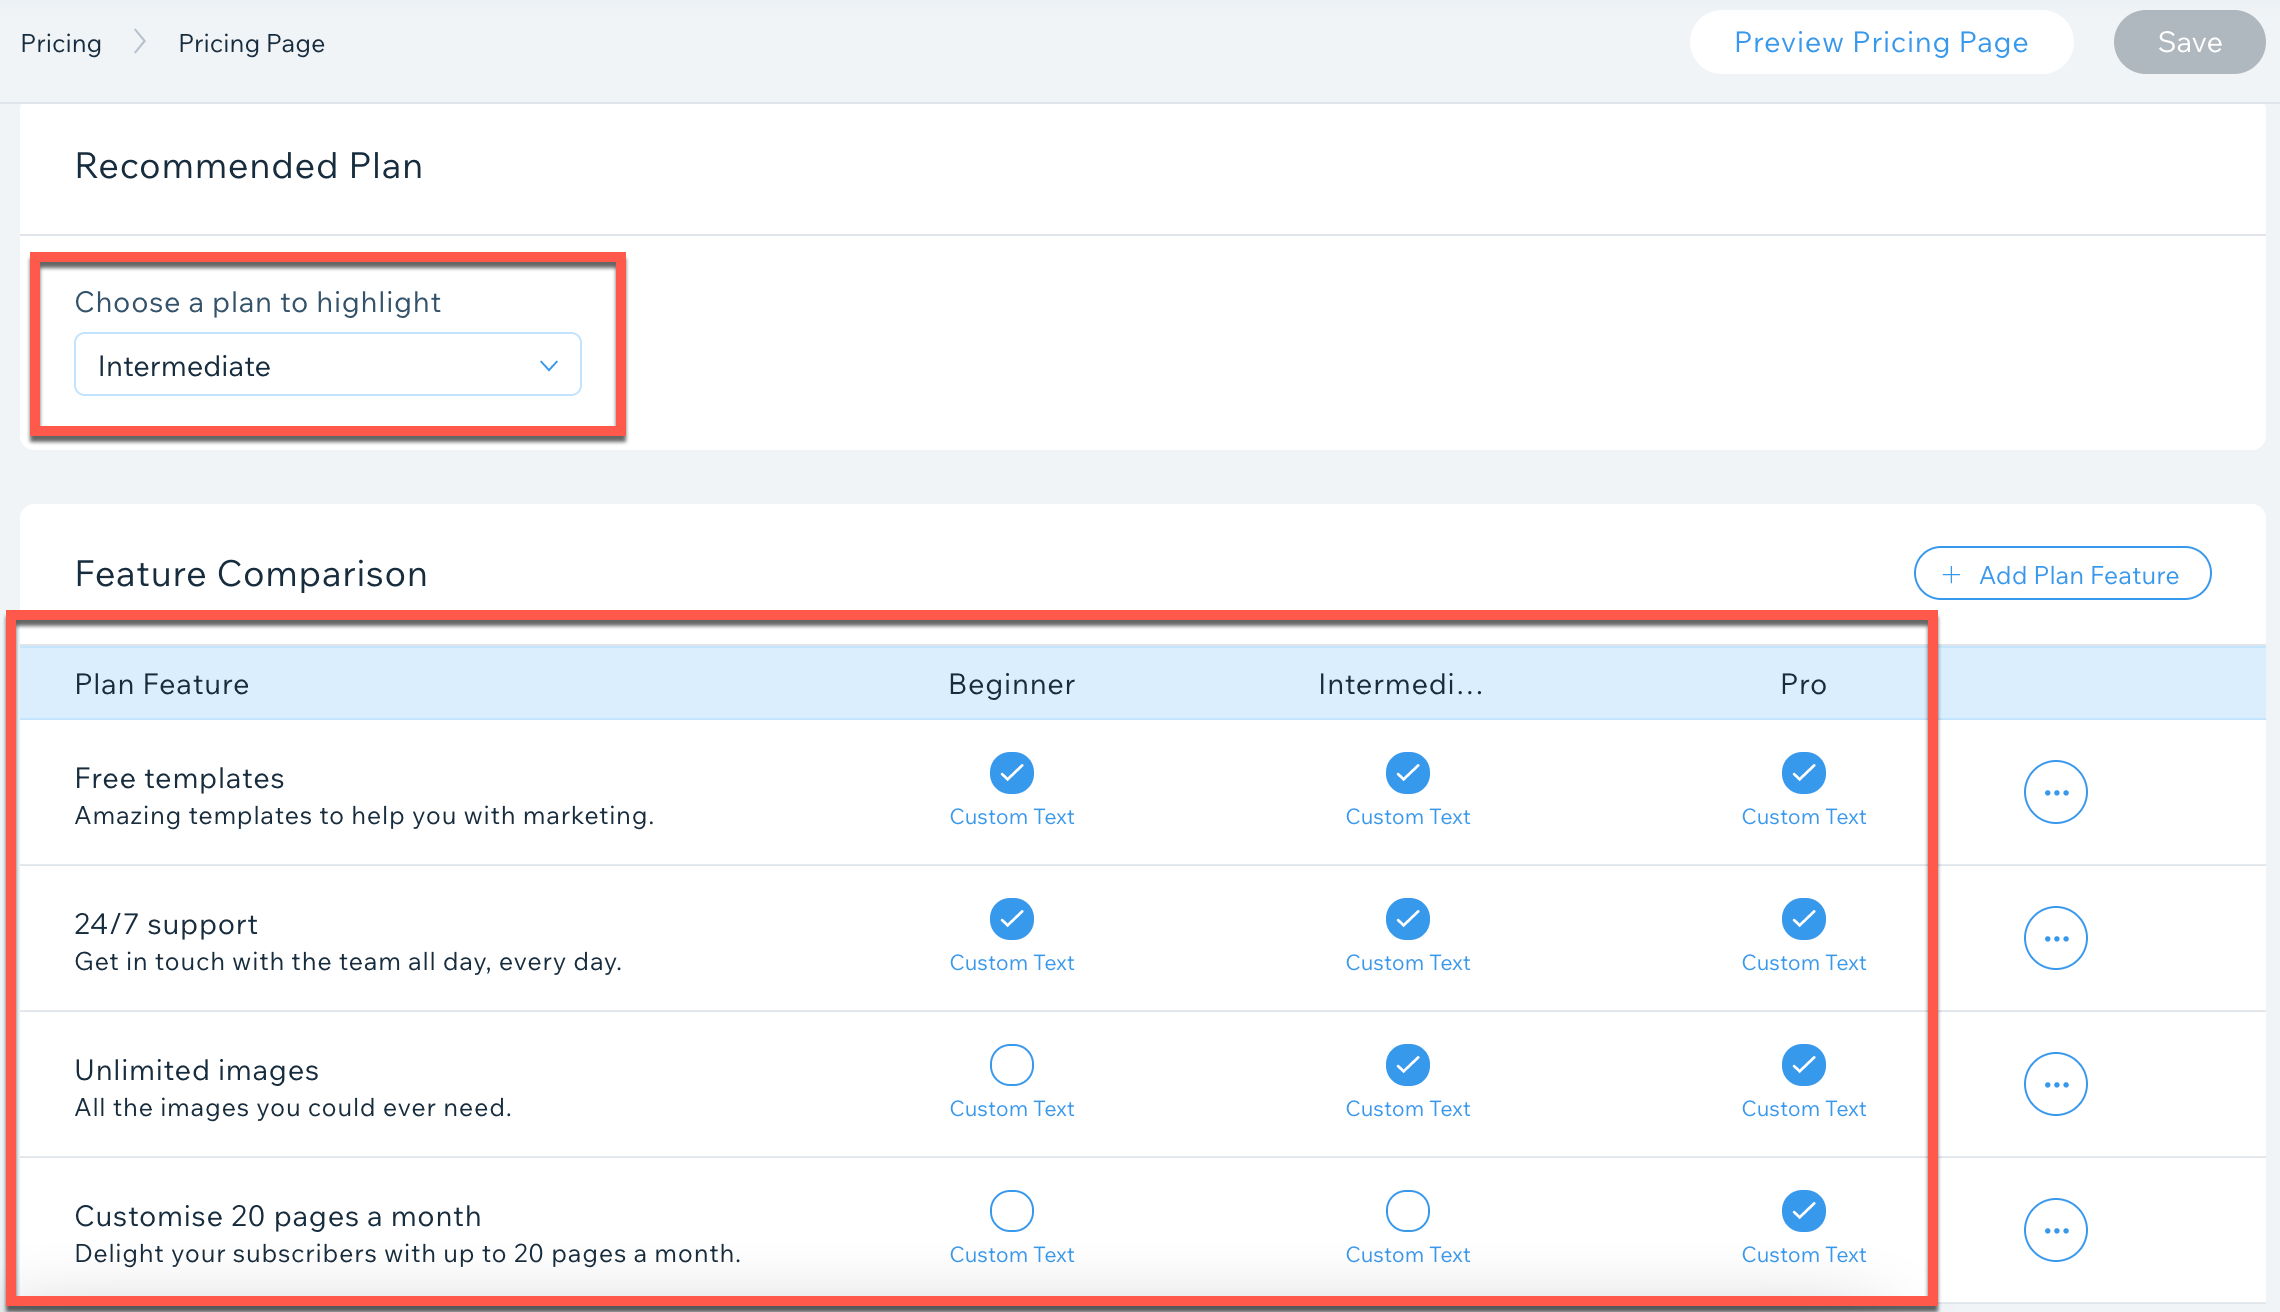
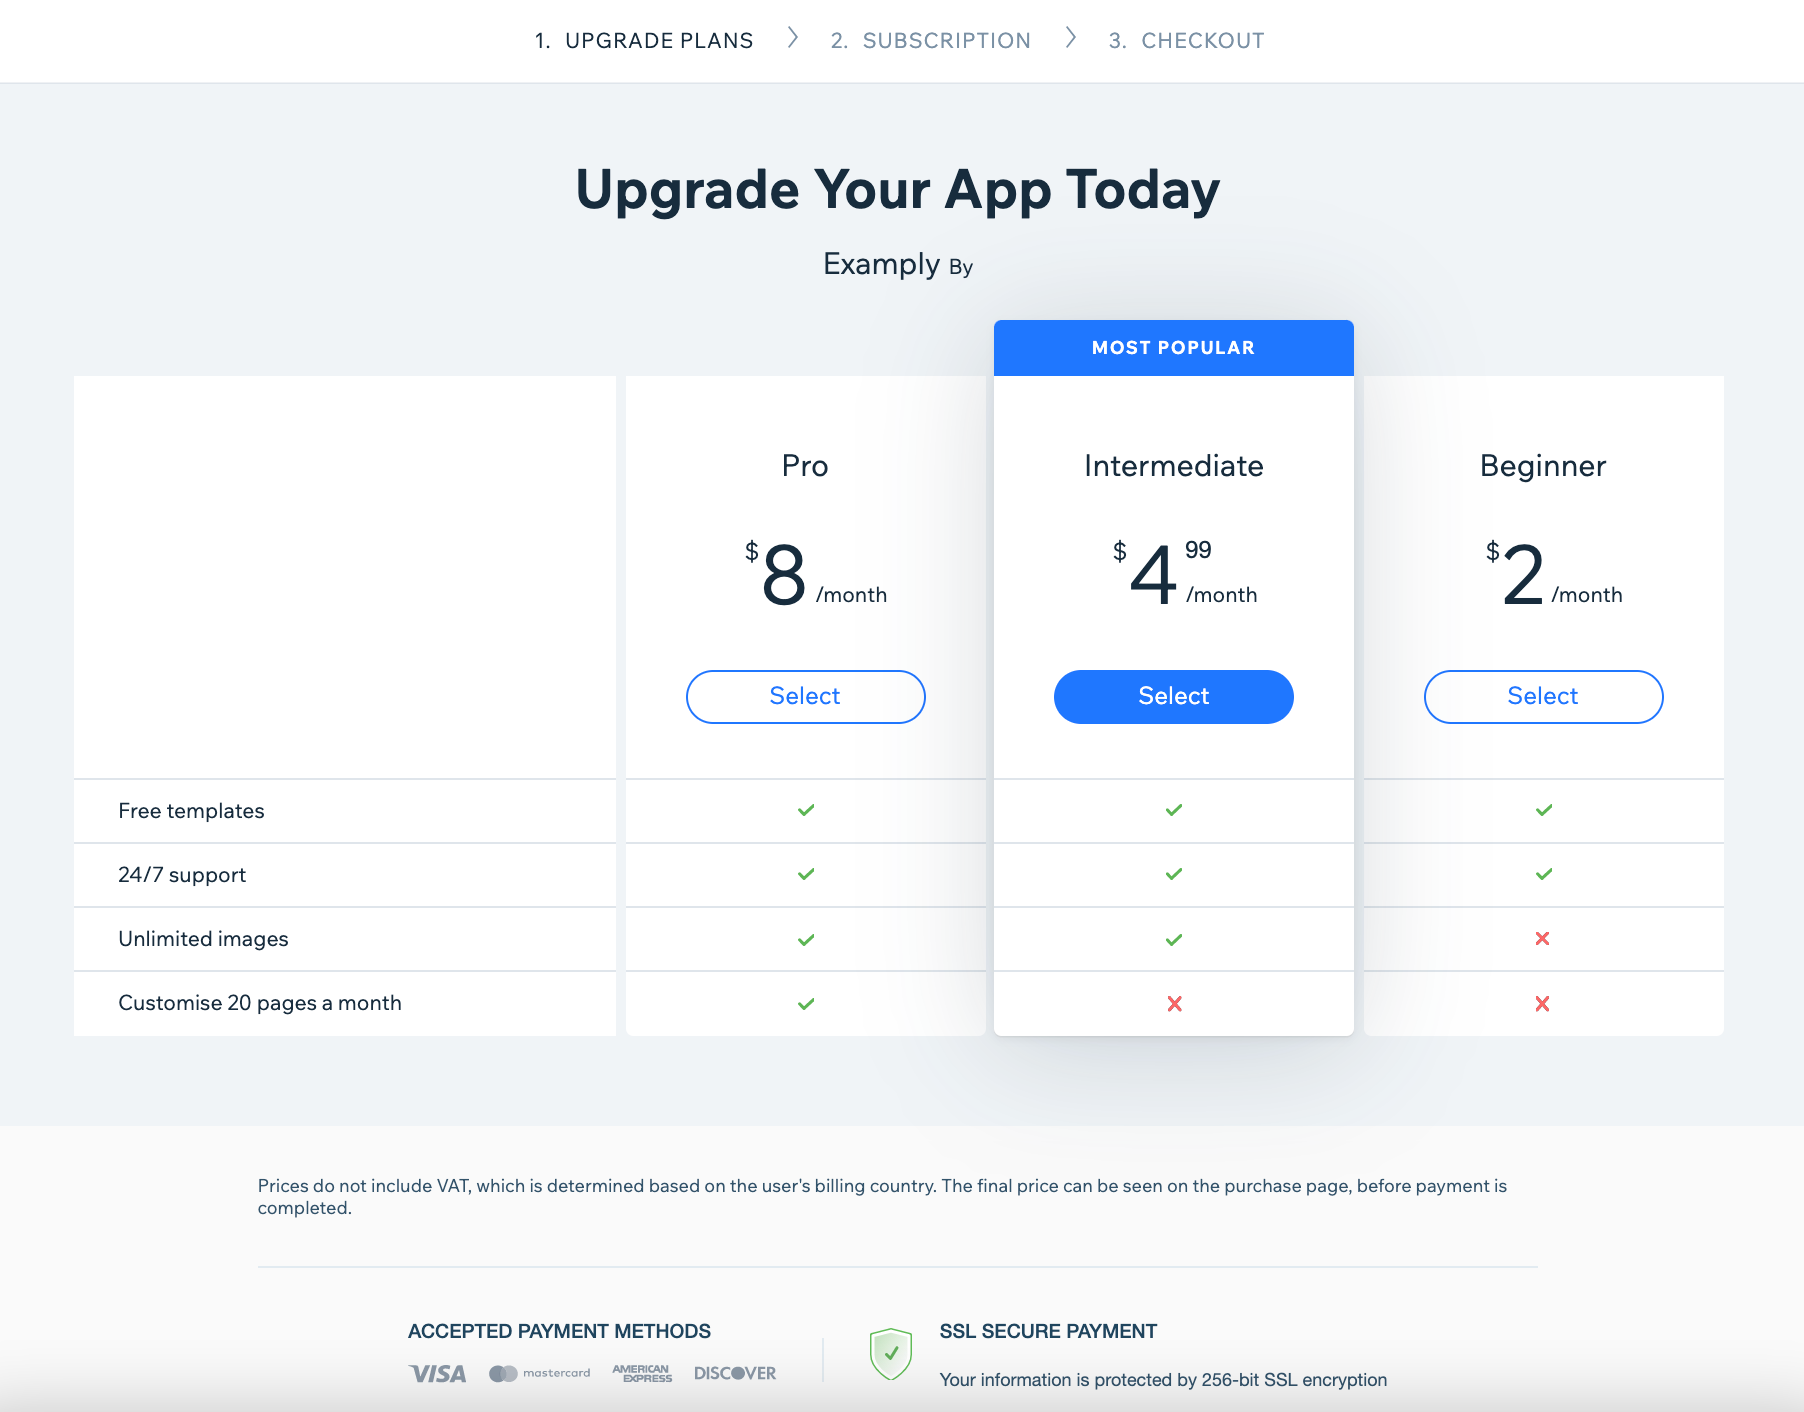
7. You can hit Preview Pricing Page at the top of the page to see how it'll look live on site. Here's how the example we set up looks:
Note:
When a user pays to upgrade your app, they'll keep paying this price even if you increase it later. If you decrease the price, the lower price is applied to all users – even those that upgraded before the change.
Lead users to the Pricing Page
To make sure your upgrade CTAs lead to our Pricing Page you'll need to use the URL below with the App ID and Instance ID in the correct place:
URL example
https://www.wix.com/apps/upgrade/APPIDHERE?appInstanceId=INSTANCEIDHERE