Set Up Automation Triggers for Your App
Wix Automations help users to streamline work processes and save time on manual tasks. Some examples of automations that can be configured are:
- Email a customer a week before an invoice is due.
- Send a chat message when a visitor navigates to a page.
- Notify site collaborators when a visitor submits a form.
Become a trigger provider
Third-party apps are now able to provide triggers for automations. As a trigger provider, you can integrate events from your own service to allow site owners to create automations with your triggers. This means you can trigger existing Wix Automations actions like send an email, populate a Google Sheet, or create a task.
You'll set up your app's trigger in the Wix Developers Center and relevant events will be reported via the Triggered Events API.
Key terminology
Here's a breakdown of the key terms you'll encounter while working with triggers and automations.
- Automation: Consists of a trigger and one or more actions. Automations are typically created by site collaborators, although some automations can be preinstalled by Wix.
- Trigger: A configuration that defines the event that activates an automation, as well as the expected payload schema. Triggers are defined per app and can be used by site owners in their automations.
- Event: Activates automations that use a specified trigger. Events are reported by providers when something happens in the provider's service. A reported event contains a payload that meets the schema requirements defined by the app that created the trigger. An event can be a real-time event or a scheduled event.
- Real-time event: An event that happens at the time it's reported.
- Scheduled event: An event that doesn't happen when it's reported, but rather at a future date and time as reported in a designated field in the payload – like an invoice's due date or an event's start time
- Action: The result of an automation, which happens in response to a trigger. A site owner can configure an action to happen immediately, after a certain delay, or in the case of scheduled events, a set amount of time before the event.
1. Get to know reportEvent
For an automation to be triggered you need to implement a call to reportEvent in your app whenever a trigger event occurs. To do this, sign with your appDefId and metaSiteId on a site where the event occurred.
2. Add an app icon
Your app needs an app icon as this is displayed with your trigger.
- Go to Market Listing > App Info in the side menu of the Wix Developers Center.
- Upload a suitable image.
- Click Save.
Learn more about app icons.
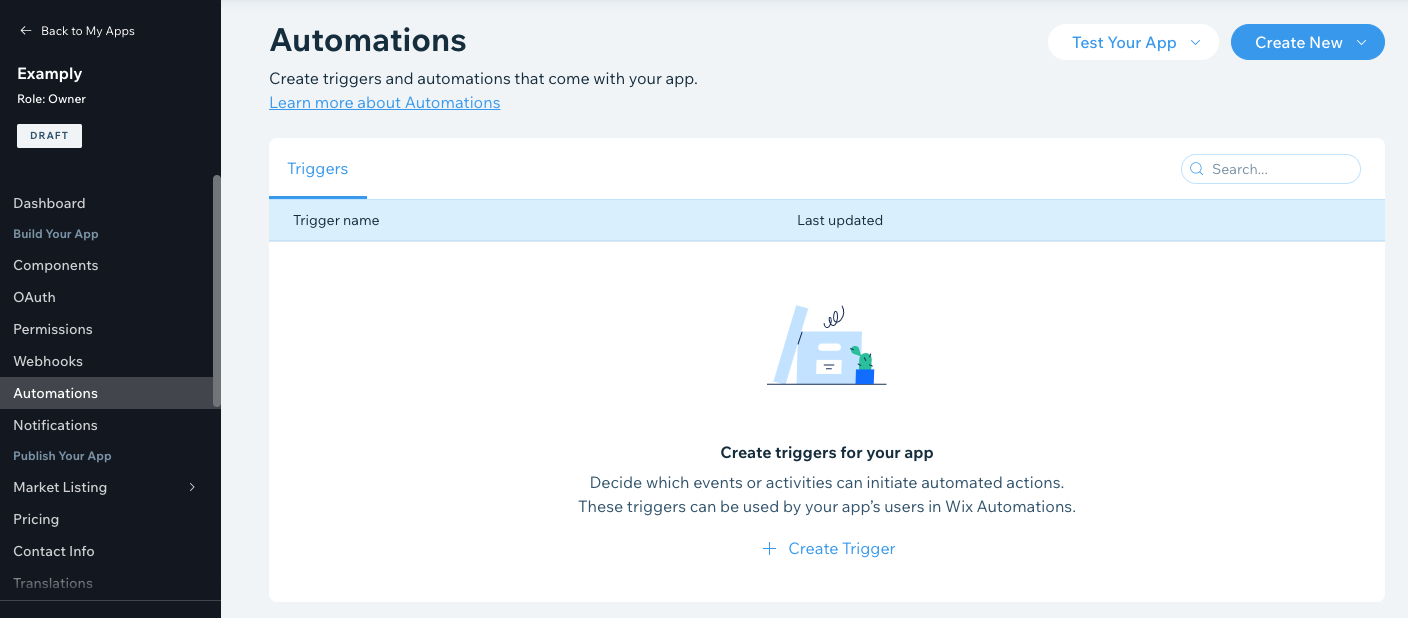
3. Set up a trigger
- Go to Automations in the side menu of the Wix Developers Center.
- Click Create New > Trigger.
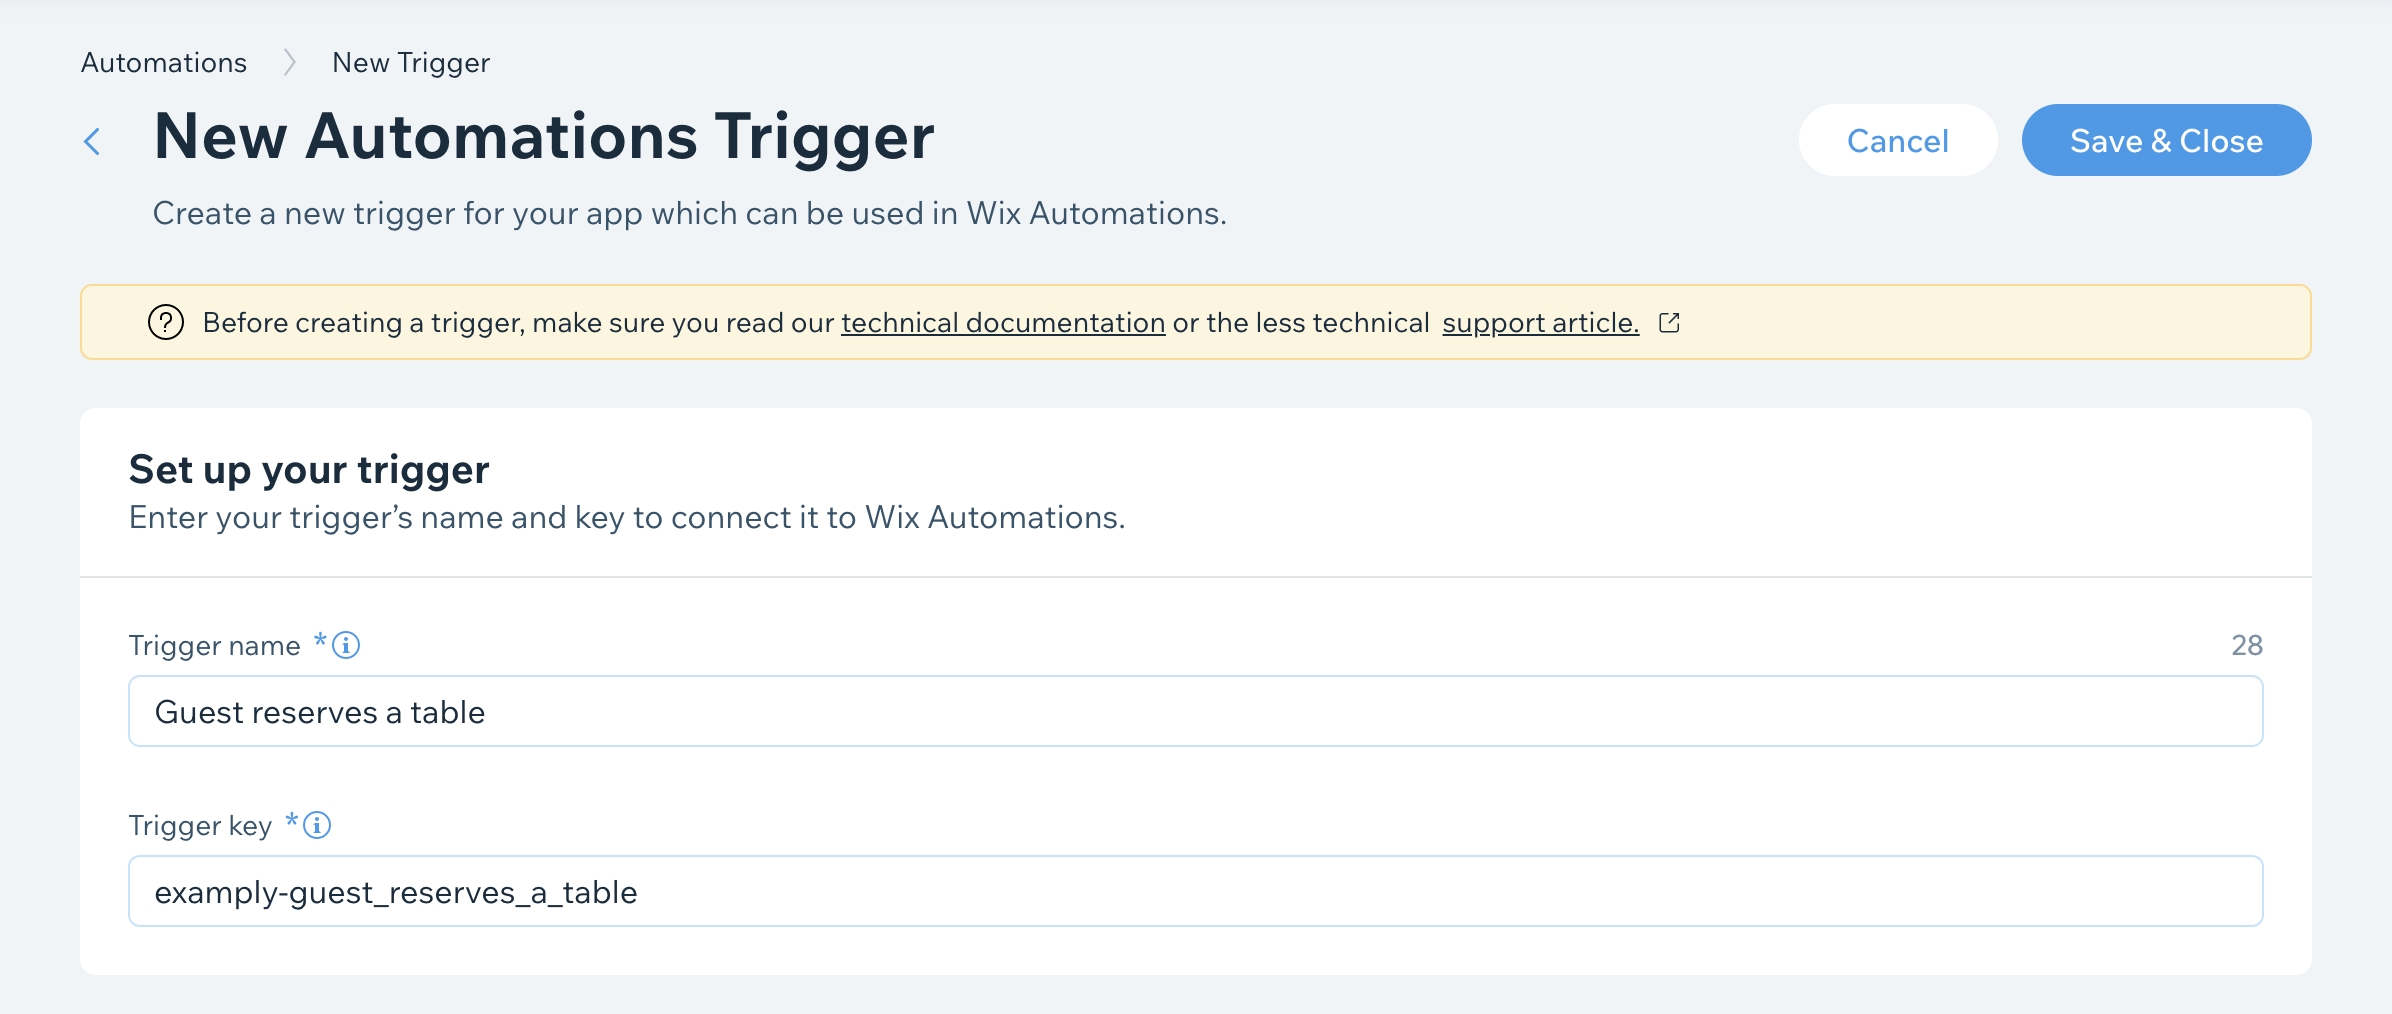
- Add a Trigger name: This is displayed to users and should indicate what the trigger does.
Best practice for your trigger name
- Use present simple (unless past tense makes more sense), singular, sentence case (no period)
- Keep it short and scannable (up to 40 characters)
- Remove “a/an” from the beginning, and “is” where possible. E.g. "A form is submitted" becomes "Form submitted"
- Make sure it can’t be confused with another app/trigger. E.g., “Reservation made” becomes “Guest reserves a table”
4. Add a Trigger key: This is your trigger identifier.
Things to know about your trigger key
- It should be a lowercase slug.
- It should be unique for each of your apps.
- It's used when reporting the trigger in 'reportEvent'.
- It can't be edited after the trigger is published.
- It isn't visible to users.
4. Configure the payload schema
A trigger's payload schema is a JSON Schema that includes fields of info, or properties, which are retrieved with your trigger event. The trigger's schema represents the information that is transferred from reportEvent.
They're used to:
- Include dynamic variables from the schema in the action.
- Validate your triggers. If a payload is missing a required property, it won’t trigger an action.
- Send relevant info to the automation’s action. This info can be used in emails, webhooks, etc.
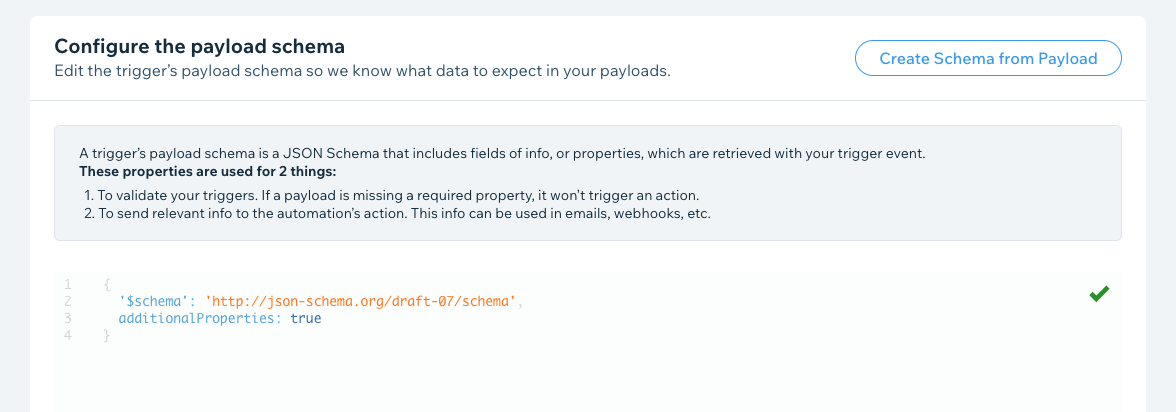
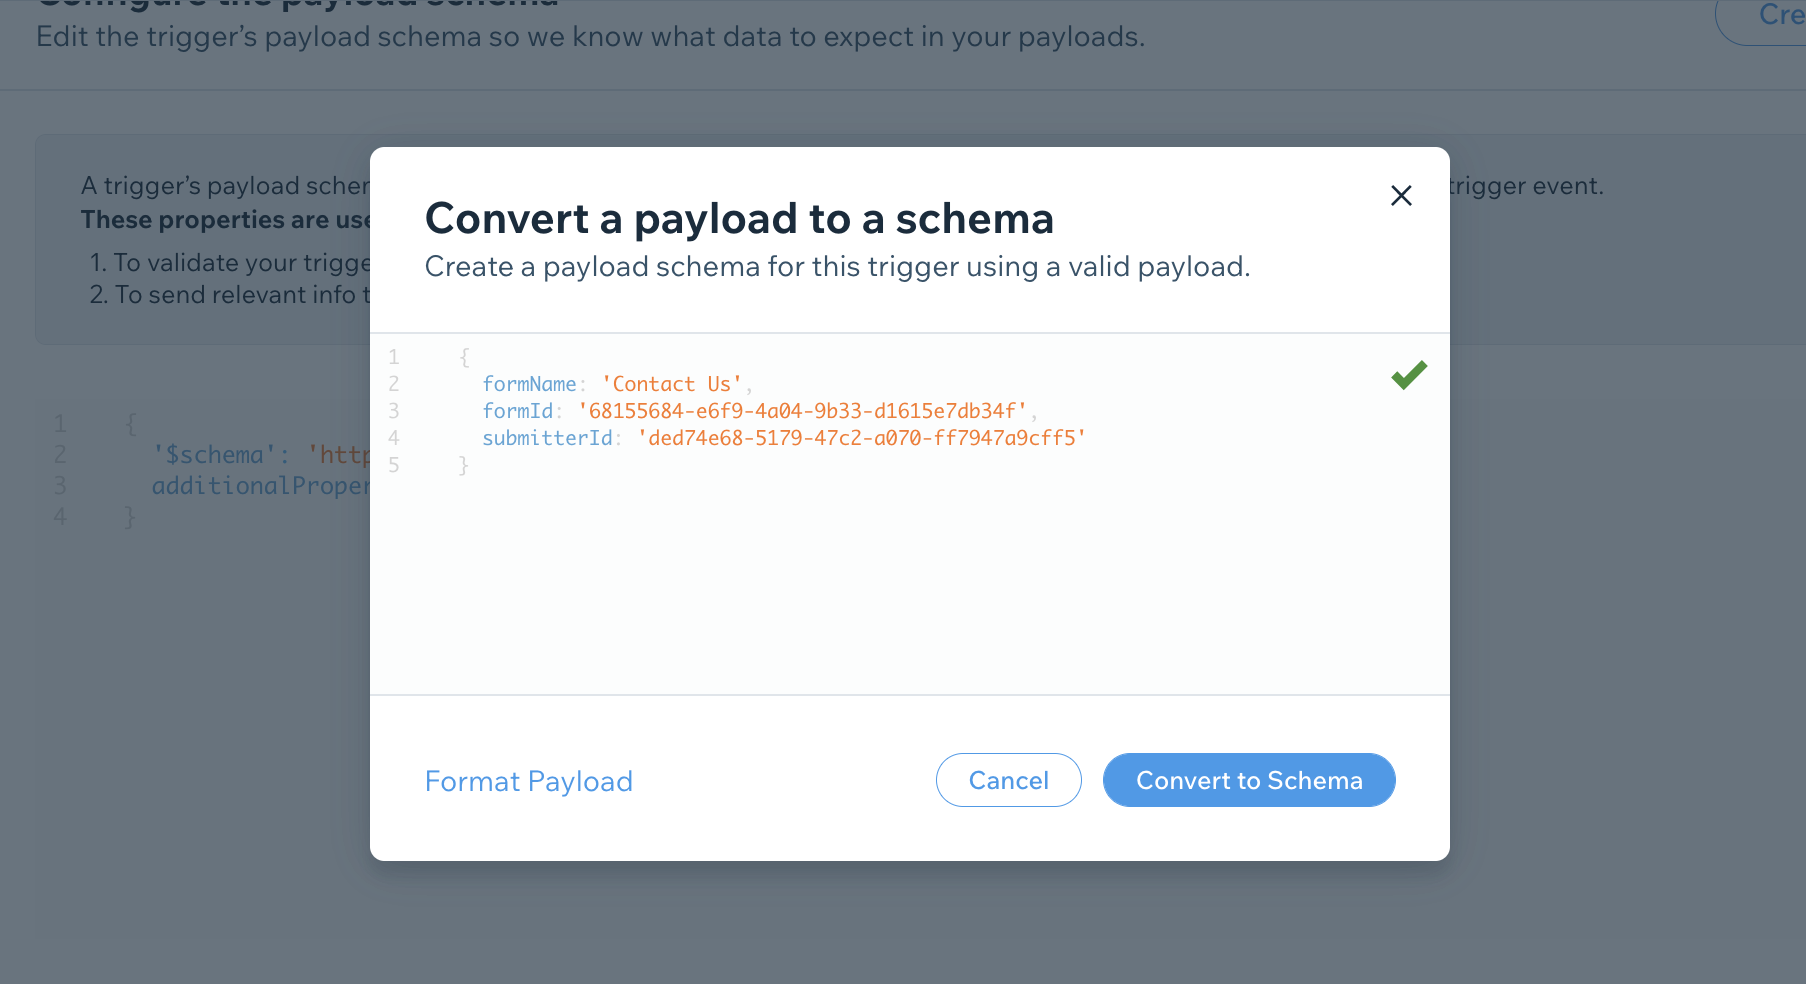
a. Create a starter schema (recommended)
To create a starter schema with sample values and required properties, click the Create Schema from Payload button and follow the steps. You can then fill in the rest of the schema as needed.
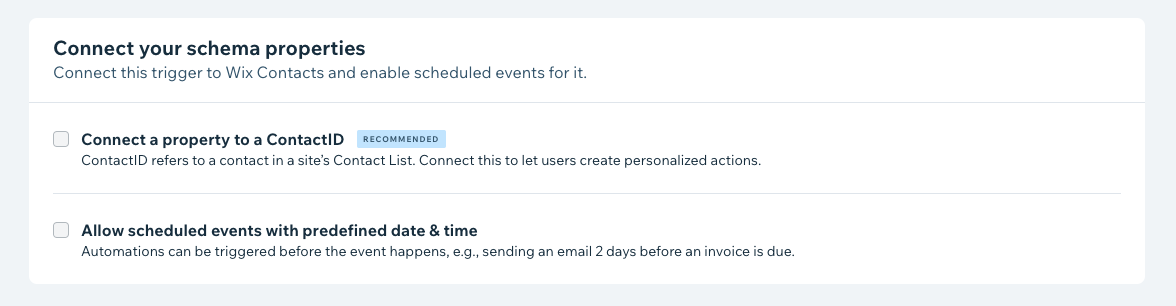
b. Connect your schema properties
You can connect your trigger to Wix Contacts and enable scheduled events for it.
Connect a property to a ContactID (recommended): This refers to a contact in a site's Contact List – you should connect this to allow users to create personalized actions. Only property fields with UUID format can be connected. Connecting to contactId results in enrichment of the payload with information about the contact (email, name, etc.). This is required for email automations.
Note: If your connected IDs that appear in your schema with IDs used in Wix, it'll update in the editor and add the field 'identityType'.
Allow scheduled events with a pre-defined date and time (optional): This trigger is for an event that is scheduled in advance. You should use this if you need to set the action's timing before the event, like an invoice's due date or an event/session's start time.
Learn more about reporting and scheduling events.
Note: If you connect a property it'll update the JSON Schema editor and add the field "futureDate: true".
5. Add filter fields to your trigger
Let users configure their trigger to only run if conditions are met. E.g. A store that wants to set up a trigger that runs when a customer has purchased a certain amount of products.
- Click Create Filter Field

- Select a filter field type:
Dropdown
Users select one or more specific items on their site from a dropdown list that can trigger the automation. E.g., a customer buys a specific product. This is a required field for users.
- Add a Label: This should describe to the user what it is they're selecting.
- Add a Tooltip: Give users more info or explain how this field affects the automation. You can leave this empty to remove the tooltip icon.
- Select the item's property from your schema: This property in the payload is used to filter the trigger. If you make changes to your schema, you might need to re-select this.
- Enter dropdown choices: One per line, with a comma separating display name (user-facing) and value (what appears in the payload).
- Choose a selection method: This can be Multiple or Single.
- Click Apply.
Number
Users customize the trigger by setting a number. E.g., a customer buys 5 products. This is a required field for users.
- Add a Label: This should describe to the user what it is they're selecting.
- Add a Tooltip: Give users more info or explain how this field affects the automation. You can leave this empty to remove the tooltip icon.
- Select the item's property from your schema: This property in the payload is used to filter the trigger. If you make changes to your schema, you might need to re-select this.
- Select a Minimum, Maximum and Default value.
- Set a comparison operator.
- Click Apply.
Toggle (boolean)
Users customize the trigger by setting an option 'On' or 'Off'.
- Add a Label: This should describe to the user what it is they're selecting.
- Add a Tooltip: Give users more info or explain how this field affects the automation. You can leave this empty to remove the tooltip icon.
- Select the item's property from your schema: This property in the payload is used to filter the trigger. If you make changes to your schema, you might need to re-select this.
- Select the default state for your toggle to On or Off.
- Click Apply.
Time since event
The automation is triggered when an event hasn't occurred for some time. E.g., a customer didn't purchase something for 3 months.
- Add a Label: This should describe to the user what it is they're selecting.
- Add a Tooltip: Give users more info or explain how this field affects the automation. You can leave this empty to remove the tooltip icon.
- Select the item's property from your schema: This property in the payload is used to filter the trigger. If you make changes to your schema, you might need to re-select this.
- Select time units that users are able to choose from.
- Set a default value and time unit.
- Click Apply.
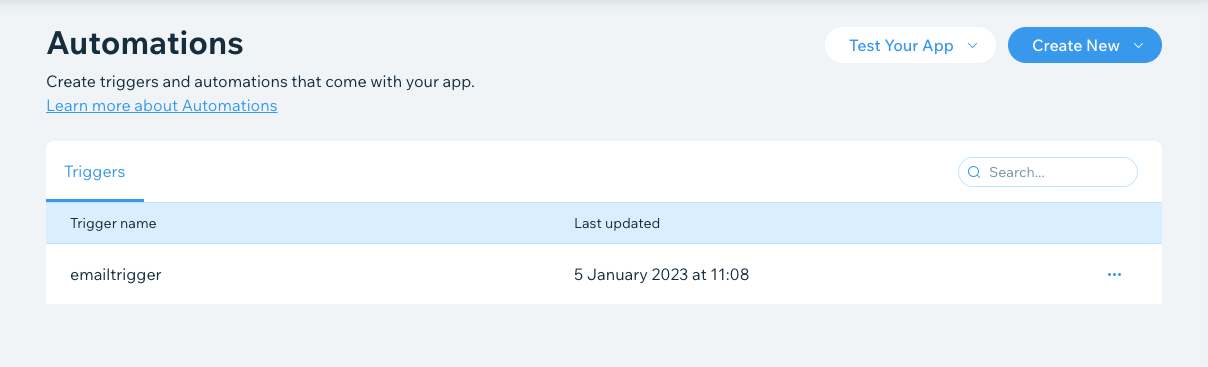
6. Save your trigger
Once all sections are complete you can click Save & Close in the top right corner. This takes you back to the Automations page and you should see your new trigger under the Triggers tab.
Edit your trigger
You can edit anything in a trigger right up until its published. When it's published, you can only make these changes:
- Make the trigger visible or hidden.
- Add a new non-required field to the payload schema.
- Change a field's display name in the payload schema.
- Change a field's description in the payload schema.
- Add a new identityType to the payload schema (if it isn't already assigned to another property).
- Change a field to 'required' or 'non-required'.
7. Test your trigger
To check that your trigger works as expected, follow these steps:
- Install your app in test mode by clicking Test Your App at the top of the page.
- Create an automation using your new trigger.
- Check that the automation works – trigger it yourself and make sure everything is working as planned.
- Send an email using the email marketing composer, and check the dynamic variables are working properly.
- Initiate a webhook action and check the schema updates as expected.
8. Translate your trigger
You can translate some written elements of your trigger into different languages to make it more accessible to audiences in other countries. To do this: go to Translations under Publish Your App.
- Click Translations in the side menu (under Publish Your App).
- Click Add Languages.
- Select the languages you want to enter translations for, and click Add.
- Click Translate for Automations next to the language you want to work with.
6. Add in the translation and click Save.
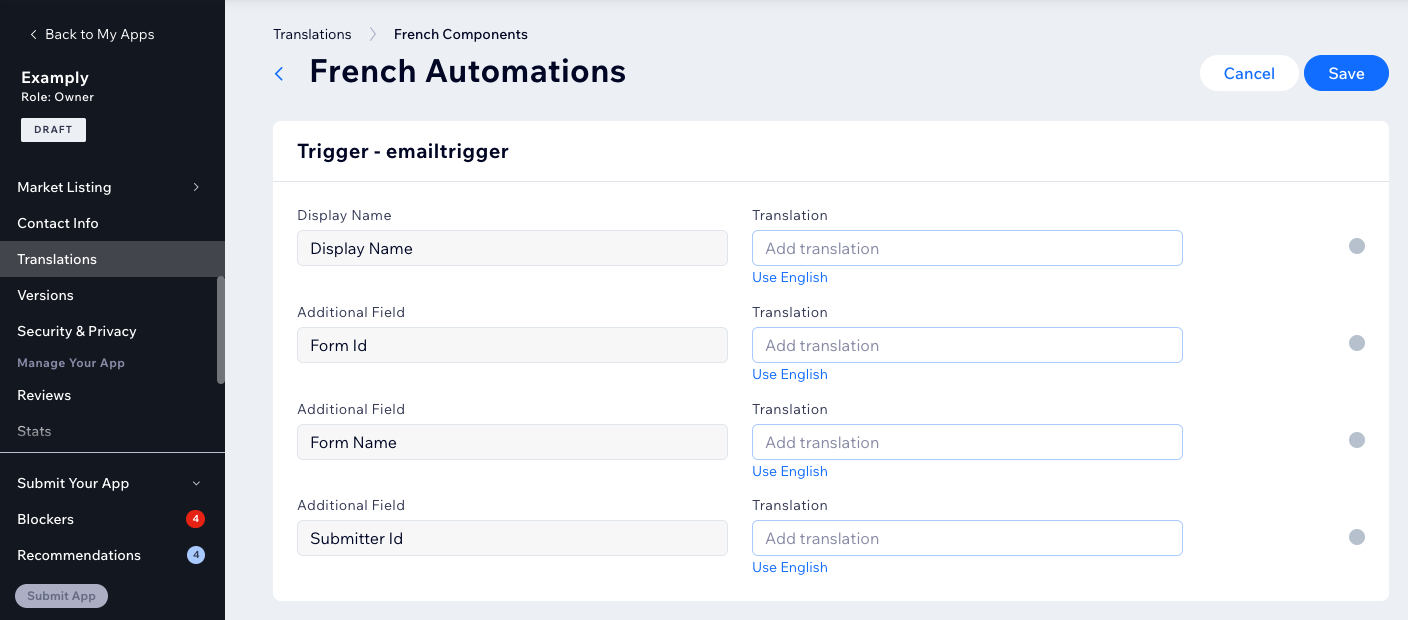
7. When you're done, go back to the language list and click the toggle next to each language you completed the translation for and want to show in your app.
9. Submit your app for review
Ready to share your brand new trigger with the world? You'll need to submit your app for review and a member of our team will check the changes and approve the latest version.