Developer Support
Set Up a Business Model
4 min read
·
Last updated on Jan 13, 2022
It's up to you which business model you choose – each has its own benefits. You can always change it later on if you want to try a new approach.
To help decide, use this simple flow chart to find out what's right for your app:

Now let's look at each option in more detail, and how to get set up.
You can find the Pricing tab in the Wix Developers' Center under Market Listing.
Tip
Hit Save and click Preview Listing at any time to see how your pricing will look to users.
Free
This can be a great way to get lots of people using your app, helping to grow your user base and brand – you can charge a fee later on if you like.
- Select Free under Business Model.

3. Because your app is free, users can add it to their site right away. Additional pricing plans won't be displayed, but you can add these later if you like.
4. Toggle Offer In-App Purchases on if you want to offer additional things (like packages of images) to users from within your free app.
5. Click Save.
Freemium
Offer a basic version for free and encourage users to upgrade for more features. You can also offer a free trial for users to try out advanced features. We think this model works best for most apps.
1. Select Freemium under Business Model.

2. Toggle Offer In-App Purchases on if you want to offer additional things (like packages of images) to users from within your app.
3. Toggle Offer a Free Trial and type in the amount of days you want to offer it for. In the Freemium model you'll be offering a free trial of your app's paid premium features.
4. Start adding Pricing Plans by clicking Add Plan. Freemium models automatically populate the Free option into your plans, which you can't remove. Additional plans that you add will be paid upgrades.
5. Click Save.

Here's how it looks on your Market Listing:

Premium
All users will pay for your app, either by monthly / yearly recurring payments or a one-off fee for a service or standalone package.
1. Select Premium under Business Model.

2. Toggle Offer In-App Purchases on if you want to offer additional things (like packages of images) to users from within your free app.
3. Toggle Offer a Free Trial and type in the amount of days you want to offer it for. We highly recommend offering a free trial if you're using a Premium model to allow users to try your app.
4. Start adding Pricing Plans by clicking Add Plan. Note that there isn't a default free plan as with Freemium.
5. Click Save.

Here's how it looks on your Market Listing:

Dynamic Pricing
This option lets you set up bespoke pricing plans, not covered by the other models – this could be something like 'pay as you go', where installing your app is free but you charge per print-on-demand item or drop-shipping sale. It could also be used if you have negotiable pricing for enterprises.
1. Select Dynamic Pricing under Business Model.

2. Toggle Offer In-App Purchases on if you want to offer additional things (like packages of images) to users from within your free app.
3. Toggle Offer a Free Trial and type in the amount of days you want to offer it for.
4. Start adding Pricing Plans by clicking Add Plan.
5. Add a Plan Name and describe your pricing in Pricing Structure.
6. Write a quick description of your plan either as a Paragraph or Bulleted List – use this to explain clearly how your pri
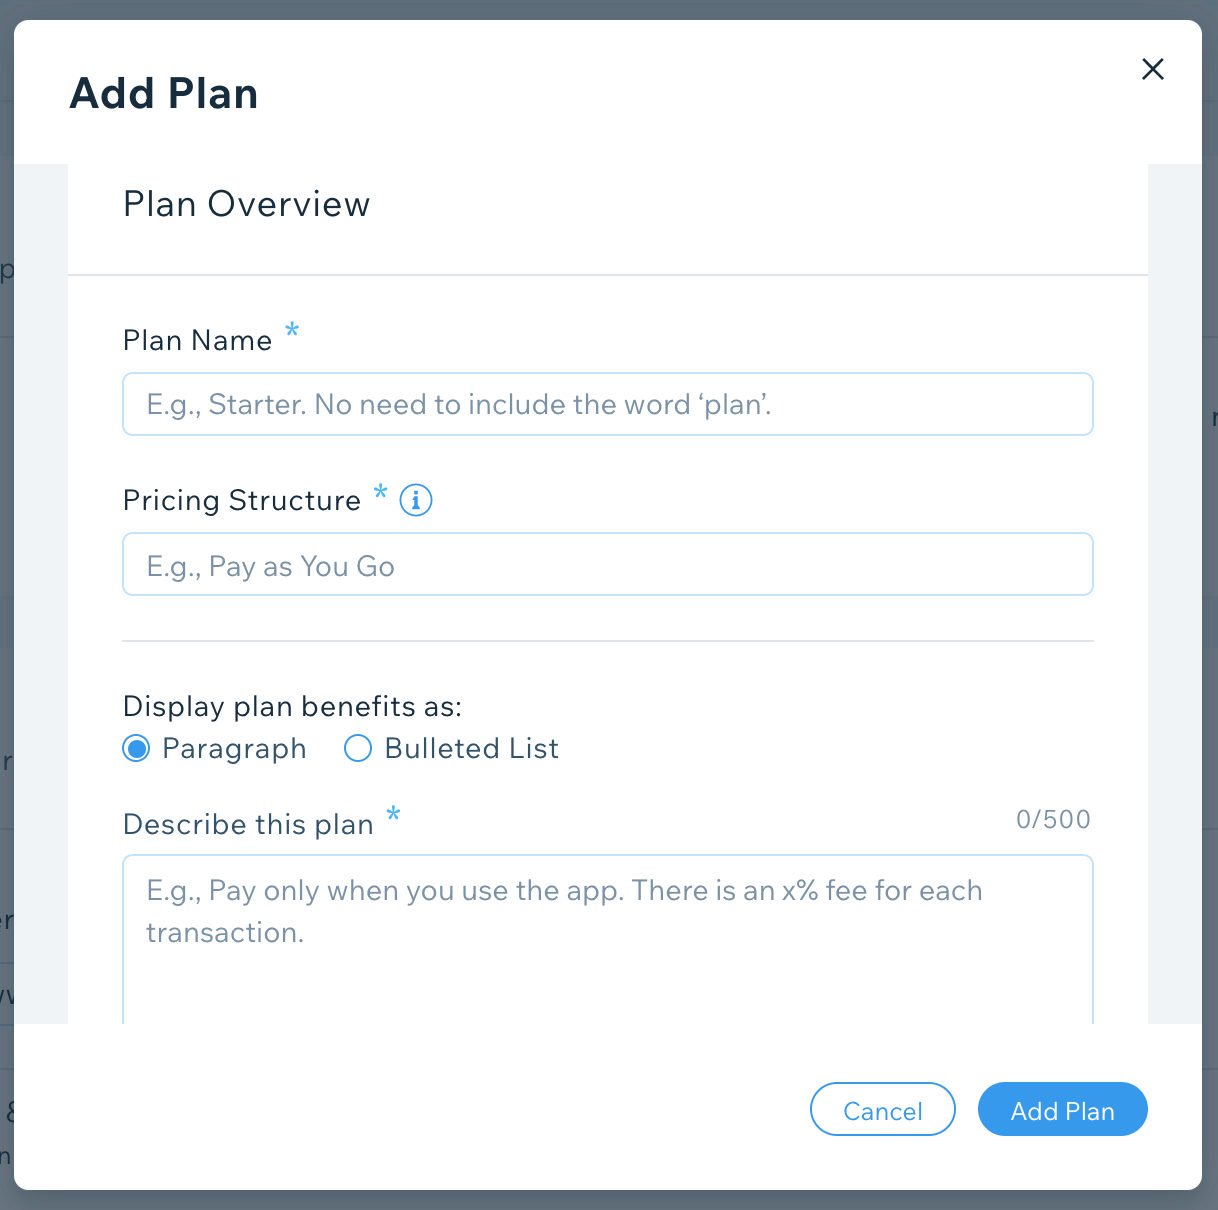
Click Add Plan, then click Save on the Pricing page.
Important"
Any plans with Dynamic Pricing that take payments outside of the Wix system need to have a Partner Billed App addendum added to the Partner Agreement.
Multiple Business Models
In some cases, you might want to offer a mix of pricing plans – for example, a combination of fixed tiers and a negotiable enterprise option. You'll need to follow the steps for Freemium or Premium above, then add an additional Dynamic Pricing plan.
To do this:
1. Select Freemium or Premium under Business Model.
2. Start adding Pricing Plans by clicking Add Plan.
3. Use the buttons under Pricing to determine what type of plan you want to add.
4. Add a description of your Dynamic Pricing plan that clearly differentiates it from your other plans.
5. Click Add Plan to add each plan, then click Save on the Pricing page.

Next steps
Now you've set up your core business model, you should make sure users can upgrade to your app's other paid tiers once they've installed your app. To do this you'll need to set up a Pricing Page.
Note:
If you have more than four plans you'll need to use an External Pricing Page to display them all.
Was this article helpful?
